Elevate your business to new heights with Genius Hub's commercial brochure, showcasing cutting-edge solutions.
Discover the epitome of modern living with our residential brochure showcasing the unparalleled luxury and innovation of Genius Hub

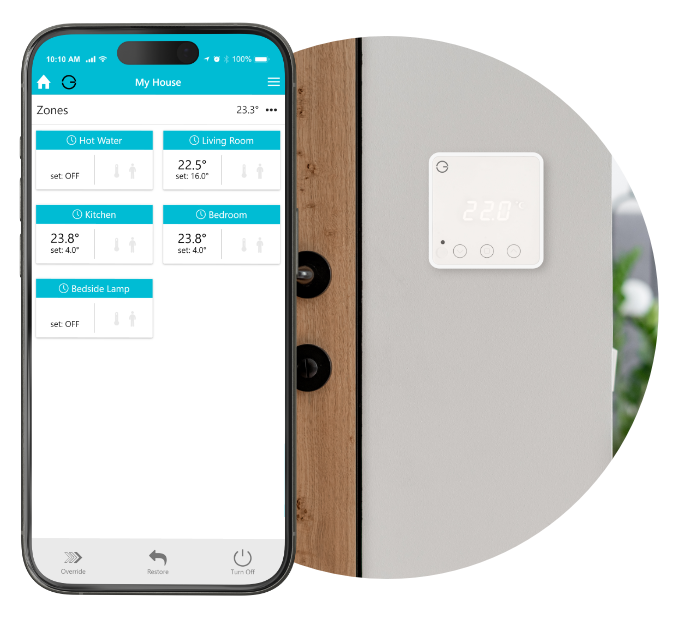
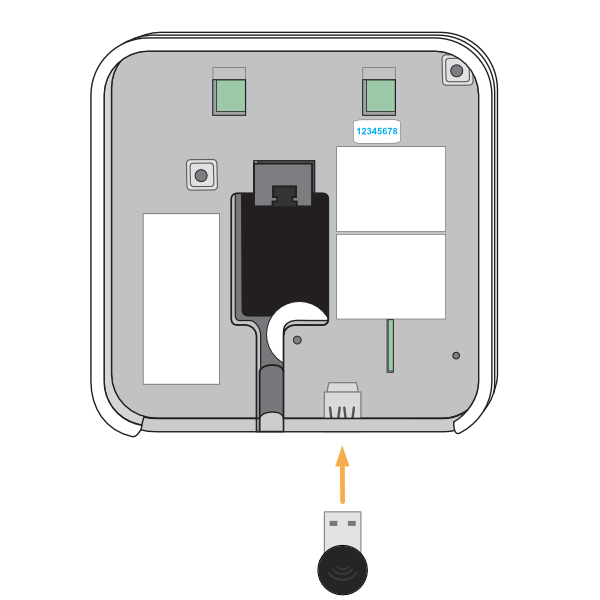
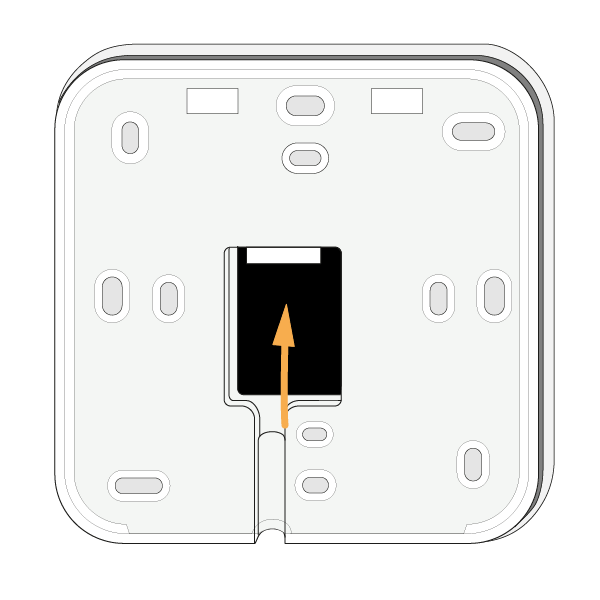
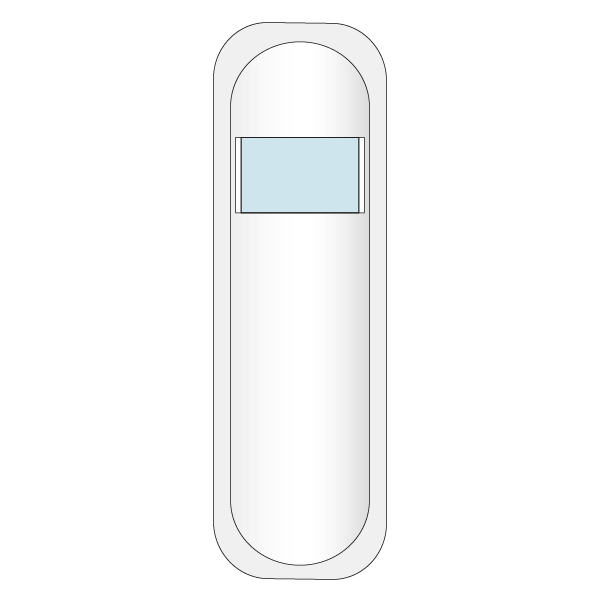
The Genius Hub can be placed flat on a surface, such as a cabinet or mounted on a wall. To mount it onto a wall, first remove the back plate by turning the Genius Hub around so the logo is facing away from you with the cutout for the Ethernet cable (see point 3) at the bottom. Slide the segmented back plate in the centre of the Genius Hub down, holding the outside of the Genius Hub. Once it has moved approximately 1 cm down, it can be pulled away from the Genius Hub. The back plate can be screwed to the wall with the segmented part facing the wall. Make note of the 8 blue characters for the Registration.
 The Genius system has been tested with a wide variety of boilers, heat pumps and other heat sources and these are controlled by the use of the Electric Switch(es).
The Electric Switch should be wired into the same fused spur as the relevant zone valve or immersion heater.
The Genius system has been tested with a wide variety of boilers, heat pumps and other heat sources and these are controlled by the use of the Electric Switch(es).
The Electric Switch should be wired into the same fused spur as the relevant zone valve or immersion heater.
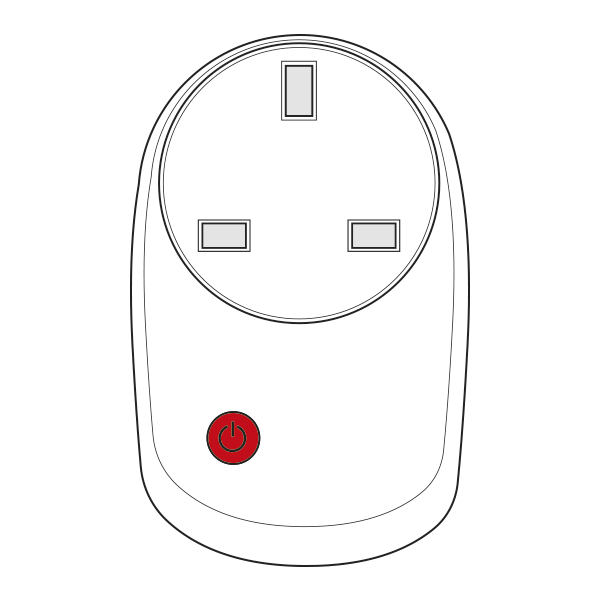
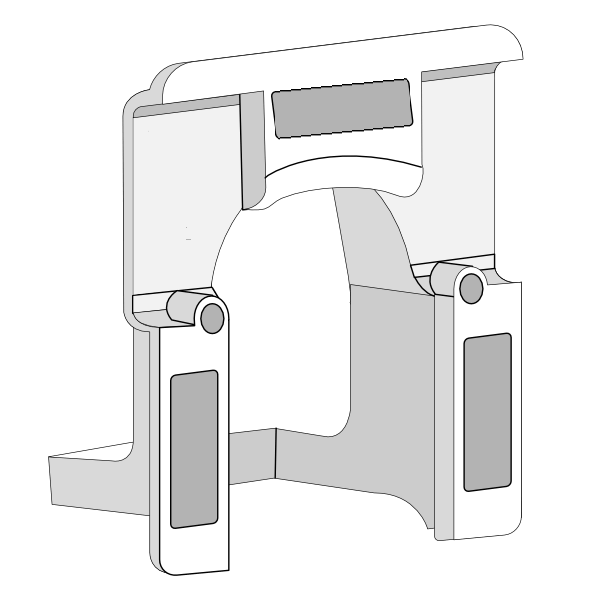
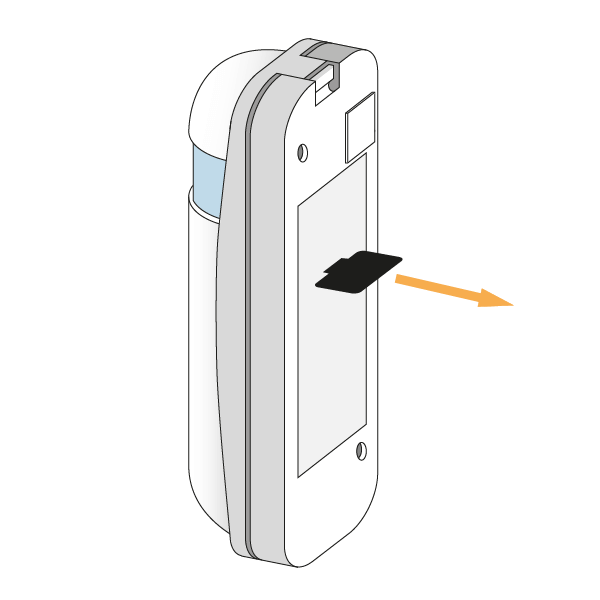
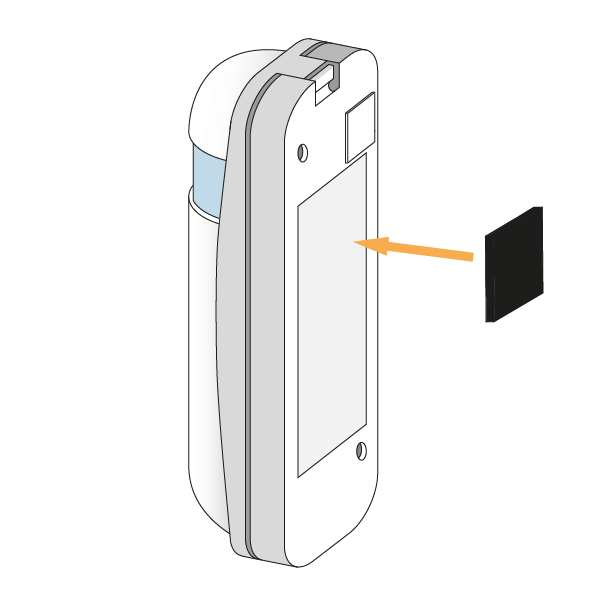
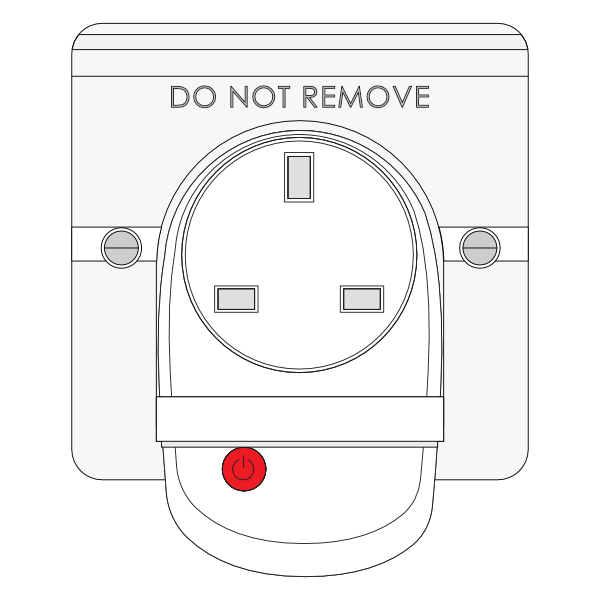 There are 2 ways to install the PlugLock with either the Smart Plug (Single Band) or Smart Plug (Dual Band):
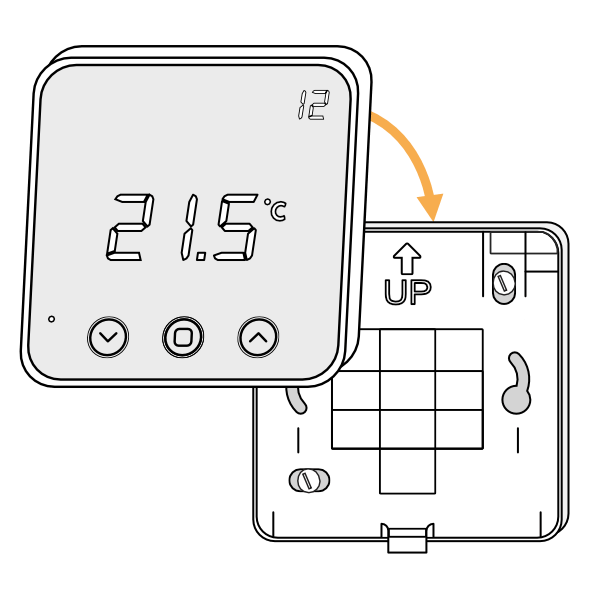
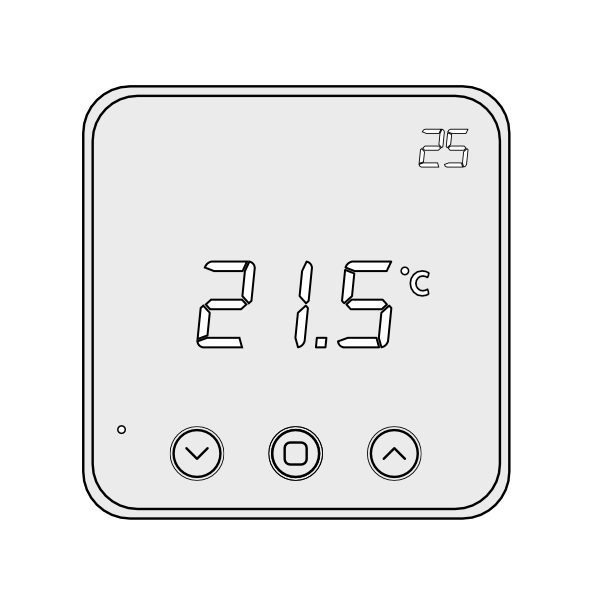 1. First, remove the Room Thermostat from its backplate using a flat bladed screwdriver and placing this in the cutout in the underside of the device, before levering the front away.
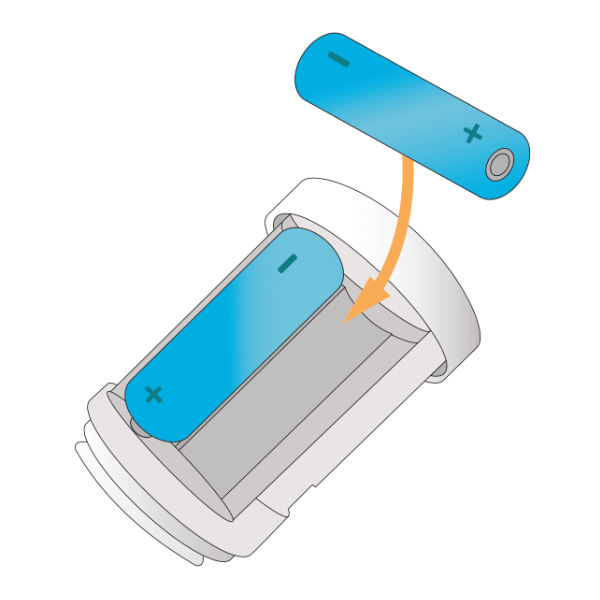
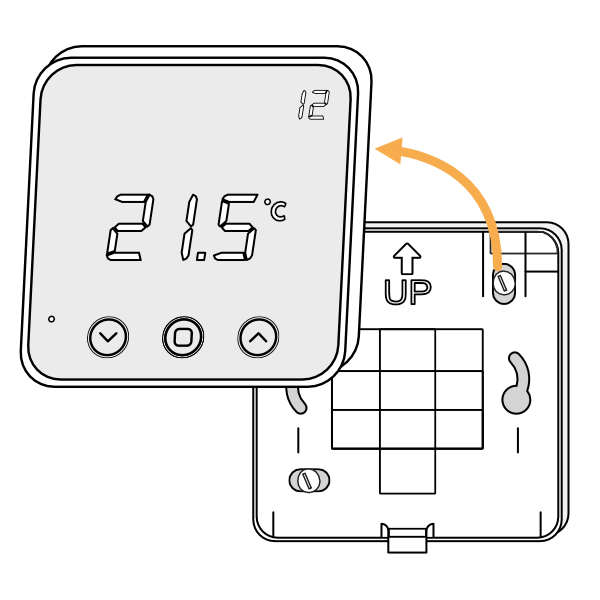 2. Turn the Room Thermostat over, so the screen is facing away from you and pull out the plastic tab to connect the battery.
 3. Affix the backplate to the wall, with the up arrow at the top.
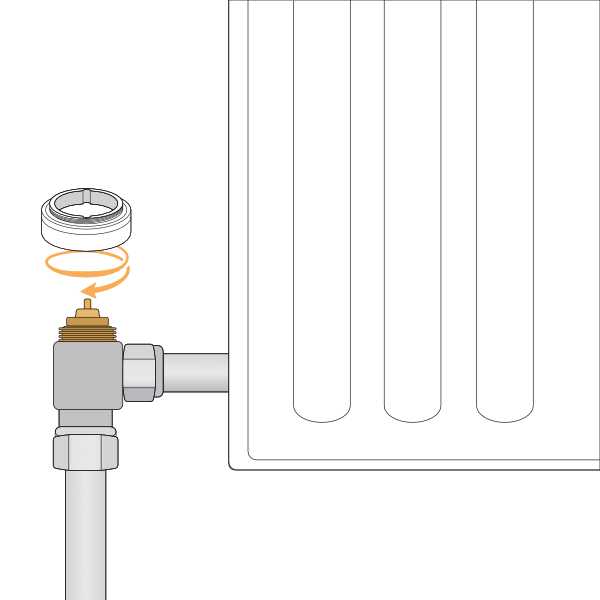
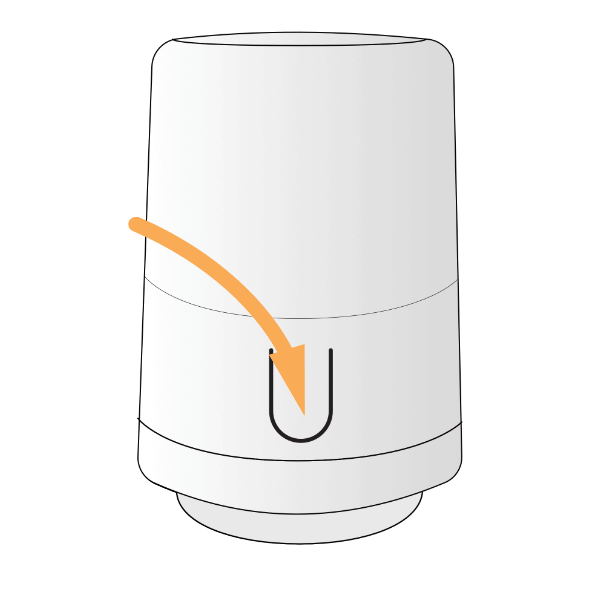
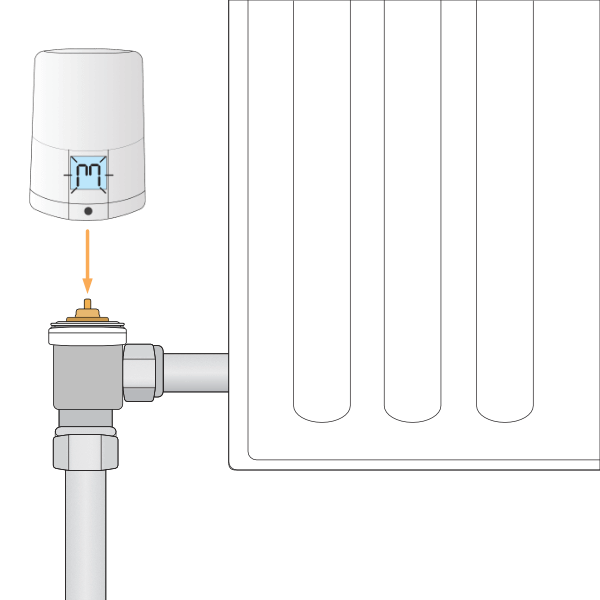
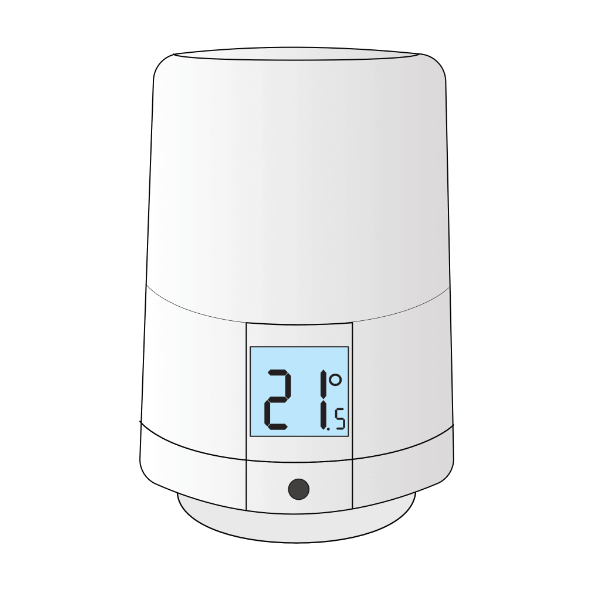 Each Radiator Valve comes with two adapters. The two adapters fit the Radiator Valve onto either an M30x1.5mm thread (the UK standard which fits most brands of TRV) or a Danfoss RA fitting (the adapter with the grub screw). To mount the Radiator Valve:
Remove the existing TRV head (this is the part which turns and normally has the number 1-5 on it to regulate the temperature) from the radiator. Usually this requires loosening a nut between the TRV head and the valve body (the part the water flows through). Fasten the new adapter to the TRV body on the radiator. Screw the adapter down onto the TRV body if using the M30 x 1.5mm adapter, or attach the RA adapter & valve onto the radiator & tighten up the grub screw using a 2mm hex (Allen) key. The image below shows the M30 adapter being fitted.
 1. First, fit the round, concave mount to the surface you want to attach the Motion Sensor to, as the Motion Sensor can be rotated on the mount, it can be placed on nearly any flat surface including walls and ceilings. As the Motion Sensor does not measure the temperature, it can be placed at any height and it does not matter if it is near a heat source in the room.
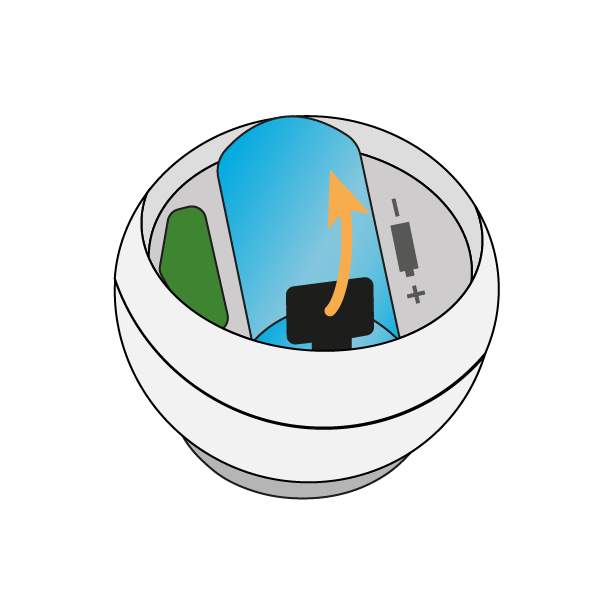
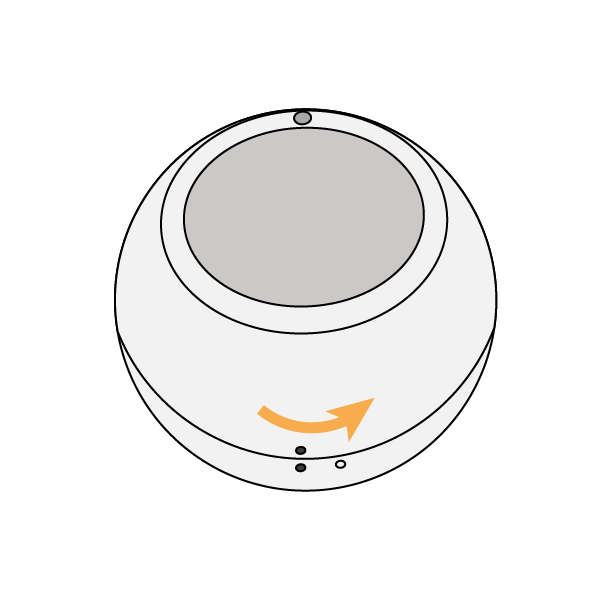 3. Pull out the battery tab, then replace the back cover with the hollow dot and solid dots lining up. Twist the back cover until the 2 solid dots line up once again.
 4. Place the Motion Sensor on the mount. The 2 parts fasten together via magnetism allowing you to rotate the Motion Sensor to face the part of the room people are going to occupy.
 Remember to leave the pack of fixings behind with the customer in case they want to move the Motion Sensor at a later date.